If you have high-value content that you would like only your members to have access to, you can create member-only pages on your site. Member-only pages are a great way to host such things as videos, challenges, and audio files.
To get started, create or edit a custom page. You can follow this help article for step-by-step instructions for how to create or edit a custom page. To make a page accessible to members only, edit the page, go to the "Page Access Settings" in the left panel and check the "Members Only" checkbox.

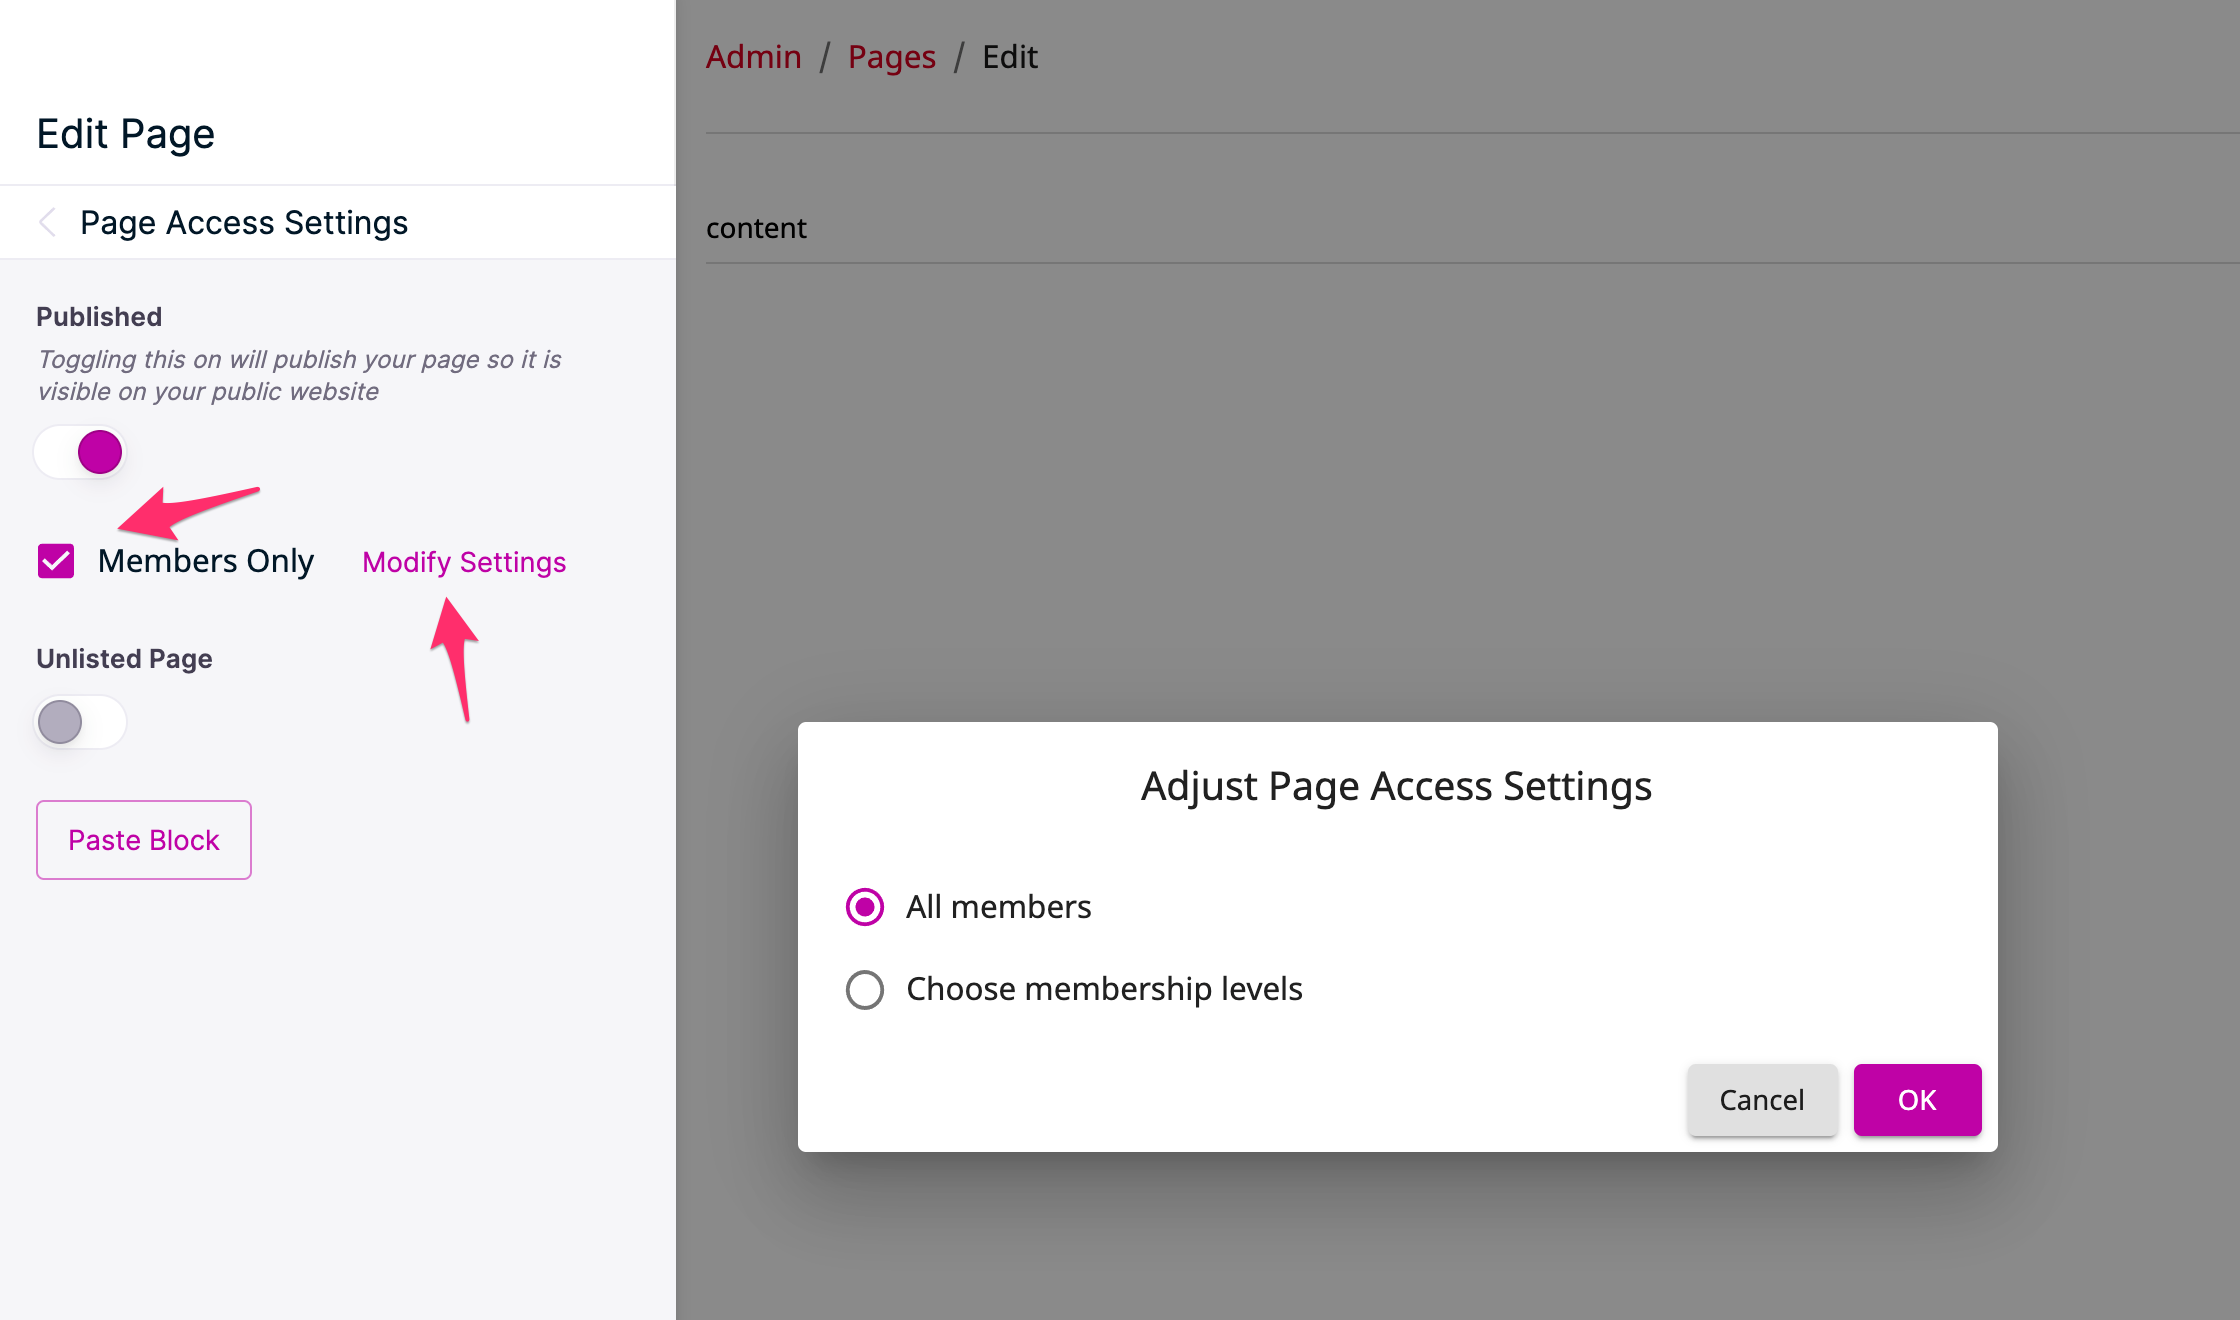
Adjusting the Page Access Settings
Once you check the box, a pop-up will appear for adjusting your page access settings. You can choose to give all membership levels access to the page or you can select specific membership levels page access. If you'd like to pick specific membership levels, pick the "Choose membership levels" radio button. Then select all the membership levels you'd like to give page access to. Then hit "OK". Make sure you hit "Publish" to save your settings!
How Your Members Access the Page
Your members will have to be signed in to your website for the page to show up. There is a "Sign In" button on the upper right-hand side of your site, or in the "Menu" icon on a mobile phone. It's the same "Sign in" button you use to sign in to your site. When they sign in with the email and password they used when they purchased their membership, the member-only page(s) on your website will show up alongside all the other pages on your site.
That's it! To see how you can add videos, images and more check out some of the other help articles in this section.
P.S. Join our Facebook group and connect with other OfferingTree users to share questions, offer ideas and insights, and support each other towards a more thriving wellness business.
Comments
0 comments
Article is closed for comments.